Multi Tenant
Introduction
The Multi Tenant feature provides the capacity of creating and managing virtual Sentilo instances related with different organizations(e.g. cities). Every organization has its own context, entities and data, and it can share information with third parties at its will, even it’s possible to have different look & feel for every tenant.
Above all the tenants, a new role emerges for administer the platform, manage the organizations and create the necessary users for administer each one. Additionally, the platform can provide additional services to its organizations, like common integrations and offer a single map showing the public information of all its organization.
The Sentilo multi-tenancy model implements level 3 of SAAS maturity model, which offers a good levels of efficiency and scalability balanced with a complexity and a reasonable operational costs:
- Single instance for all the tenants.
- Same software deployed version for all the entities.
- Unique typologies for components and sensors.
- Common data repositories for all the tenants.
- Personalization and access control for entities through admin console.
- Personalization of look & feel for tenants.
- Delegated administration for each entity, allowing them to administer its own data, devices, users and to share data a their will.
After configuring it, every organization has its own virtual Sentilo instance and can be administered autonomously.
The Organization concept
The Organizations represent the different entities, usually cities, that owns a virtual Sentilo instance. Every one can manage autonomously its own applications, providers, components and sensors. All these elements are property of the organization, and nobody outside the organization can access to them, unless the organization grants access permissions to other organizations.
Organizations are administered through the various existing user roles, and according to them, be managed in different ways:
| Role | Access type |
|---|---|
| Super Admin | The Super Admin user can create and administer organizations, users and typologies |
| Admin | The Admin user can only manage its own organization parameters and has capacity for creating his own users, applications, providers, components, sensors and alerts, which will be automatically related to its organization |
| User | The User can only access to public information data about the applications, providers, components, sensors and alerts which belong to its own organization |
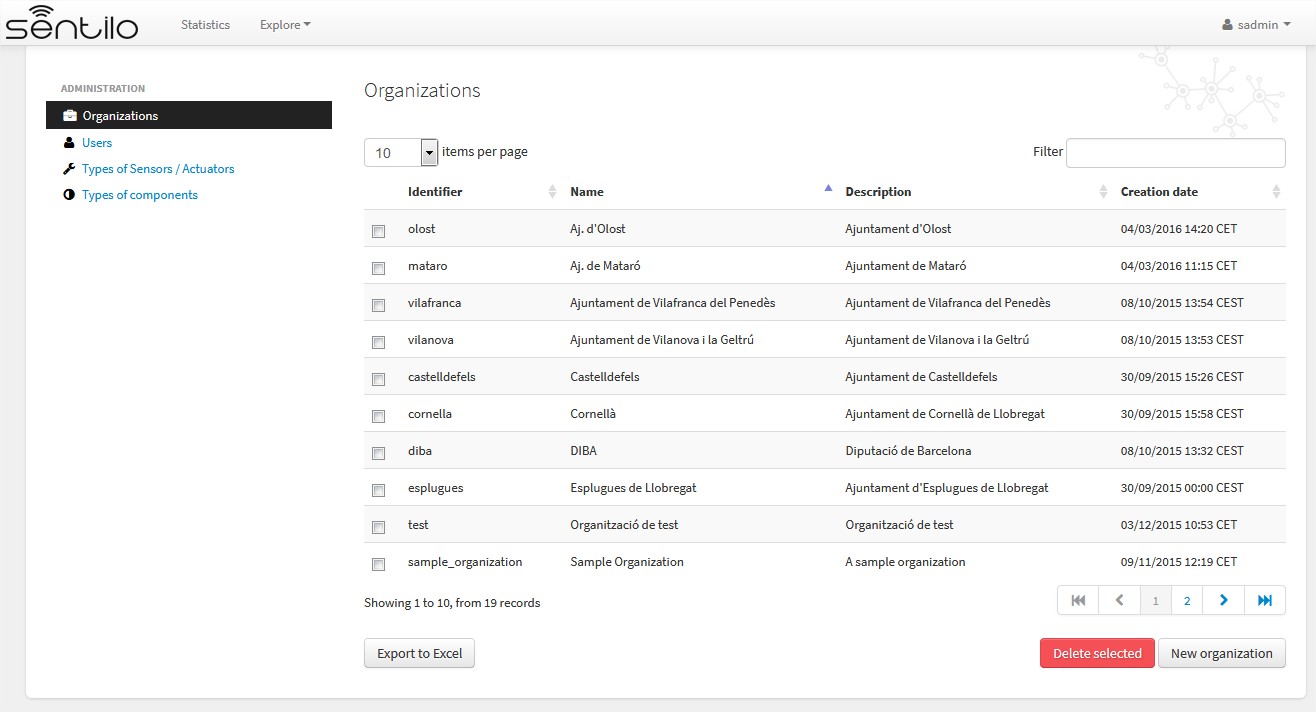
Below you can see an organization list from a multi tenant Sentilo instance, when connecting as super admin user:
Sentilo contexts
There are several virtual contexts(URL paths) for a multi tenant Sentilo instance, one for every organization and one for the public common area. It’s important to remark that for accessing to each organization console, you should choose the correct path, otherwise you won’t be able to access, even using correct credentials.
Organization console
You should access to the administration console through the corresponding url address, adding the organization id as a last parameter, as follows.
In the parameter organizationId you should inform the organization identifier where you want access to. For example, we could access to an organization named Sample Organization, with a sample_organization as organization identifier in a Senilo instance deployed in a host with name example.com:
Platform console
Super Admin users should access to the catalog console without informing any organization identifier in the url. In this case, no data is filtered by organization, and all the public information is visible in the public map and statistics:
Super Admin users are responsible of configuring the platform organizations and its users, and also to define the component and sensor typologies.
Anonymous access
Anonymous users(not logged) can access the universal viewer directly without informing organization in the url. In this case, no data is filtered by organization, and all public information is displayed in the public maps and statistics, using the platform common look & feel.
In this case, the user will see all the public information provided for the instance organizations.
Alternatively, the users can access to a specific organization public information, specifying a different URL context:
For example, we could access to an organization named Sample Organization, with a sample_organization as organization identifier in a Sentilo instance deployed in a host with name example.com:
Then the user will see all the public data offered by the Sample Organization, displayed using the organization custom look & feel.
For the rest of it, the features and behaviour of the public area is the same as described in Catalog and Maps section.
Platform administration
Super Admin users are responsible of configuring the platform organizations and its users, and also to define the component and sensor typologies. They cannot see any organization data, such as components, sensors, alerts.
Organization administration
List
Only the Super Admin user can list, create and delete organizations. After the organization is created, an Admin user can edit its own configuration settings. User role don’t have access to this information.
Details
Below, the organization creation form, as a Super Admin:
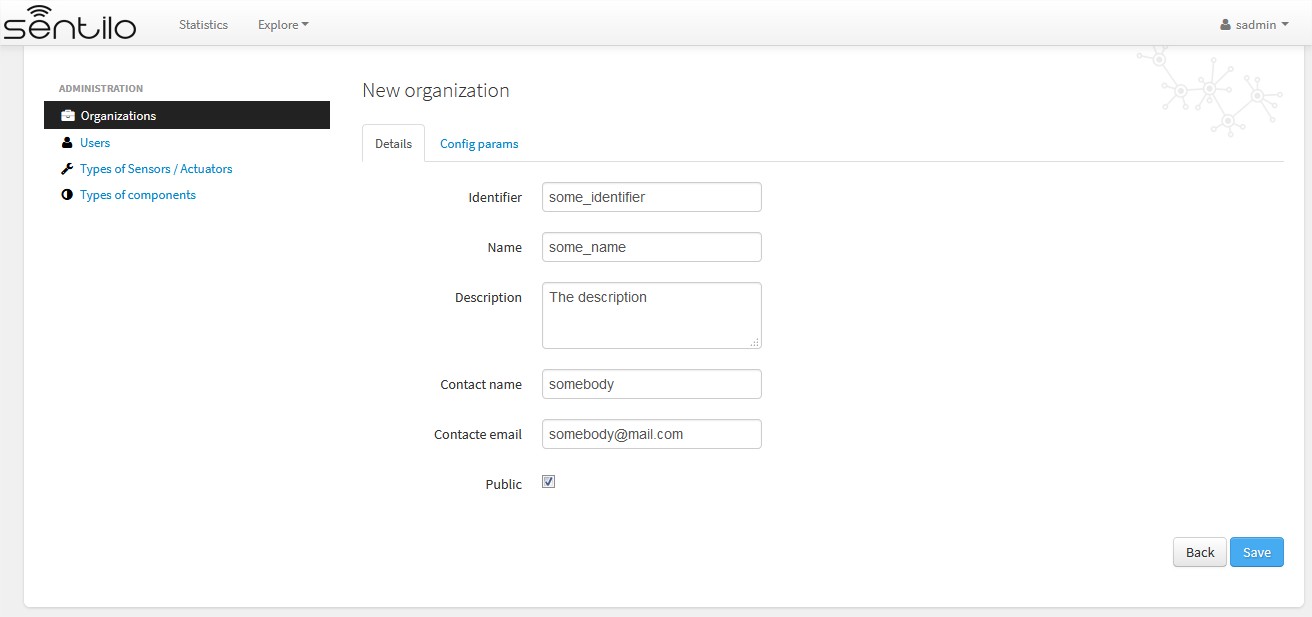
In order to create an organization, we must inform, at least, these parameters:
- identifier: an unique organization identifier
- name: the organization name
- contact name: the name of the responsible person
- contact email: the email of the responsible person
Some other parameters are optional:
- description: some description about the organization
Config params
There are some additional parameters for customizing the public & private behavior.
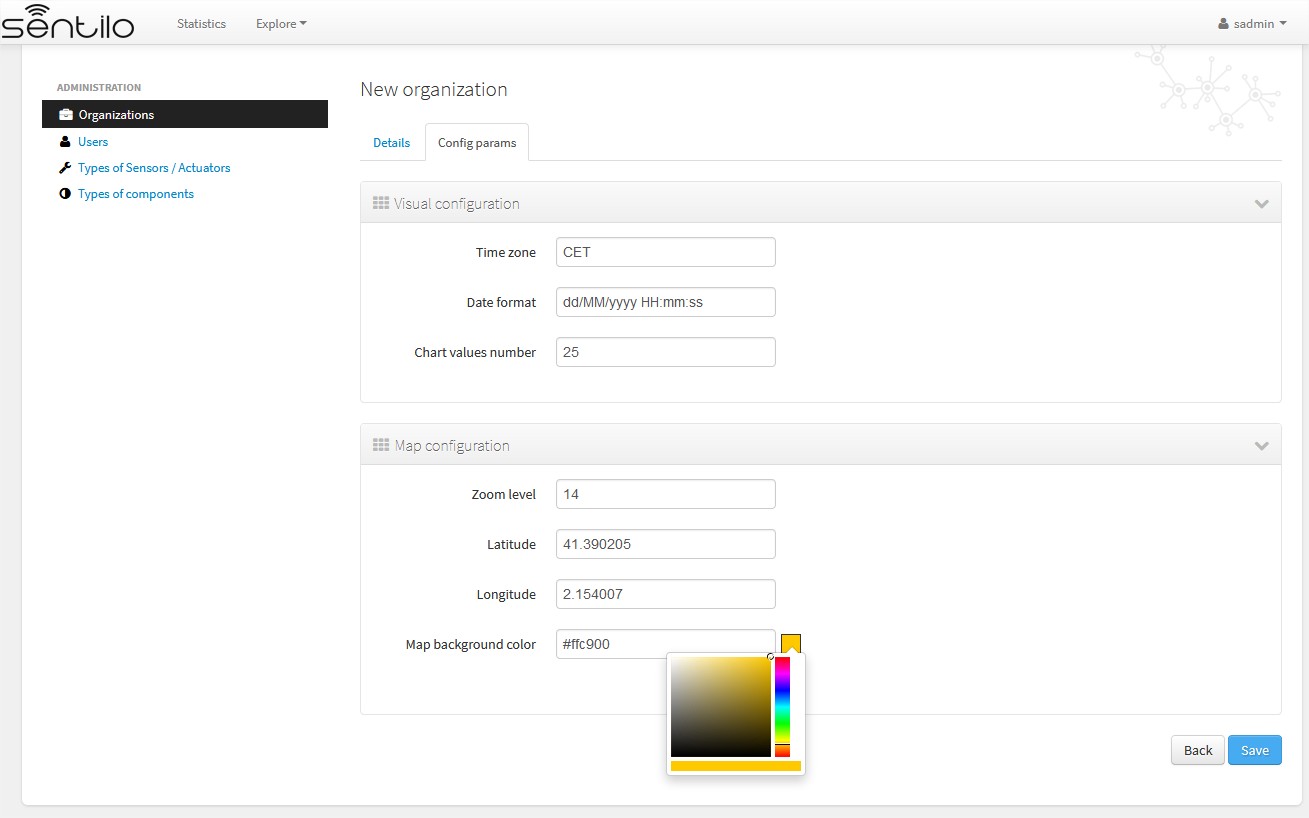
Visual configuration
These params will apply to the entire catalog application visual customization, and how the user will see the data. Note that time zone & date format are directly relationated.
| Property | Description | Comments |
|---|---|---|
| Time zone | Defines the time zone of the organization, and modifies the way to display data on screen, such as dates | You can define hourly difference or time zone abbreviations: CET, UTC, +001… |
| Date format | Defines the date format with which the data will be displayed in the application (lists, details…) | Example: dd/MM/yyyy HH:mm:ss = 30/11/2017 15:34:56 See all possible formats as Java Date Format, at: Java Date Format |
| Chart values number | Number of observations displayed on chart | It must be a positive integer number greater or equals to 10. If blank, it will be a default value of 10. This value will be overwritten by sensor’s configuration one. |
Map configuration
These params configure the universal map visualization.
| Property | Description | Comments |
|---|---|---|
| Zoom level | Zoom level of the universal map | Default value is 14. And you can define a value between 1 and 20. See possible values in: https://developers.go ogle.com/maps/documen tation/static-maps/in tro#Zoomlevels |
| Latitude / Longitude | Defines the map center in latitude & longitude values format | |
| Map background color | Define the background color of the map | Possible values applies with the colorpicker, or input a valid css / html color value |
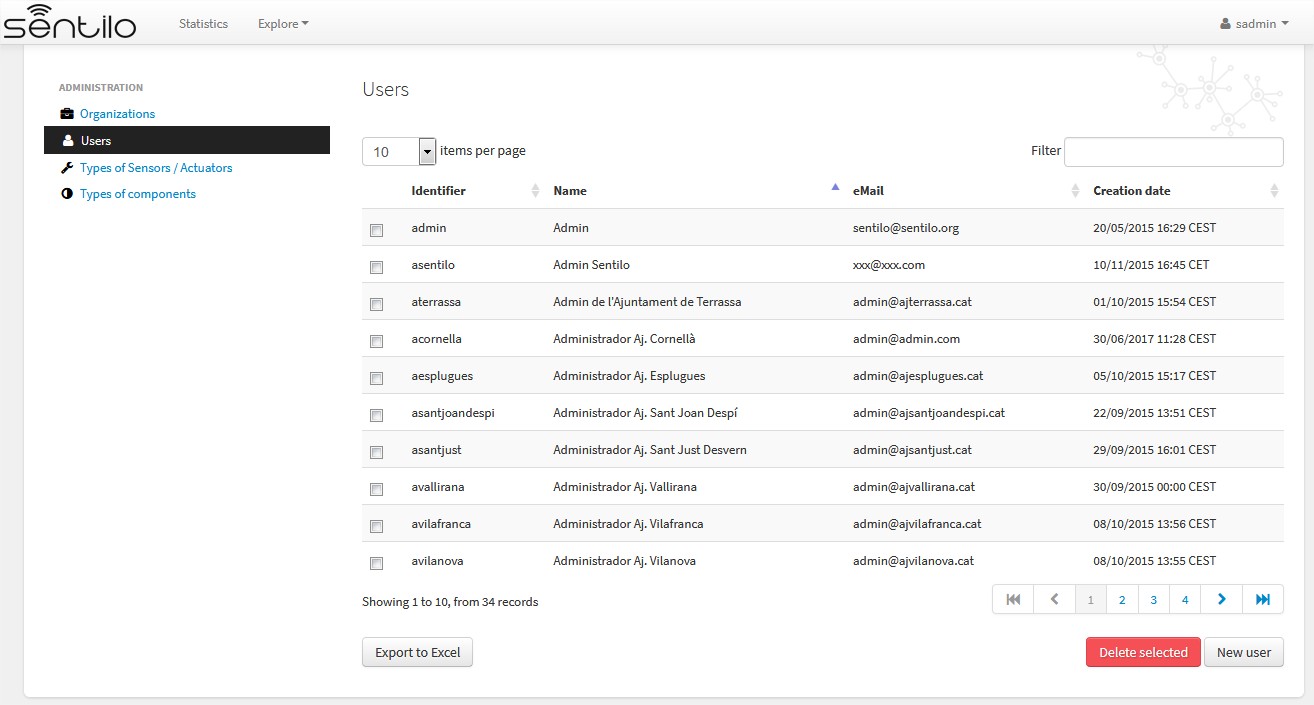
Users administration
The Super Admin user can create, edit and delete any user from any Organization whatever role they have. In Addition, Super Admin role is the unique user role that can create additional Super Admin users.
In a multi tenant instance, except for Super Admin users, when creating users, it’s mandatory to specify the related organization.
List
New user
Details
The next image shows how the new user’s form is:
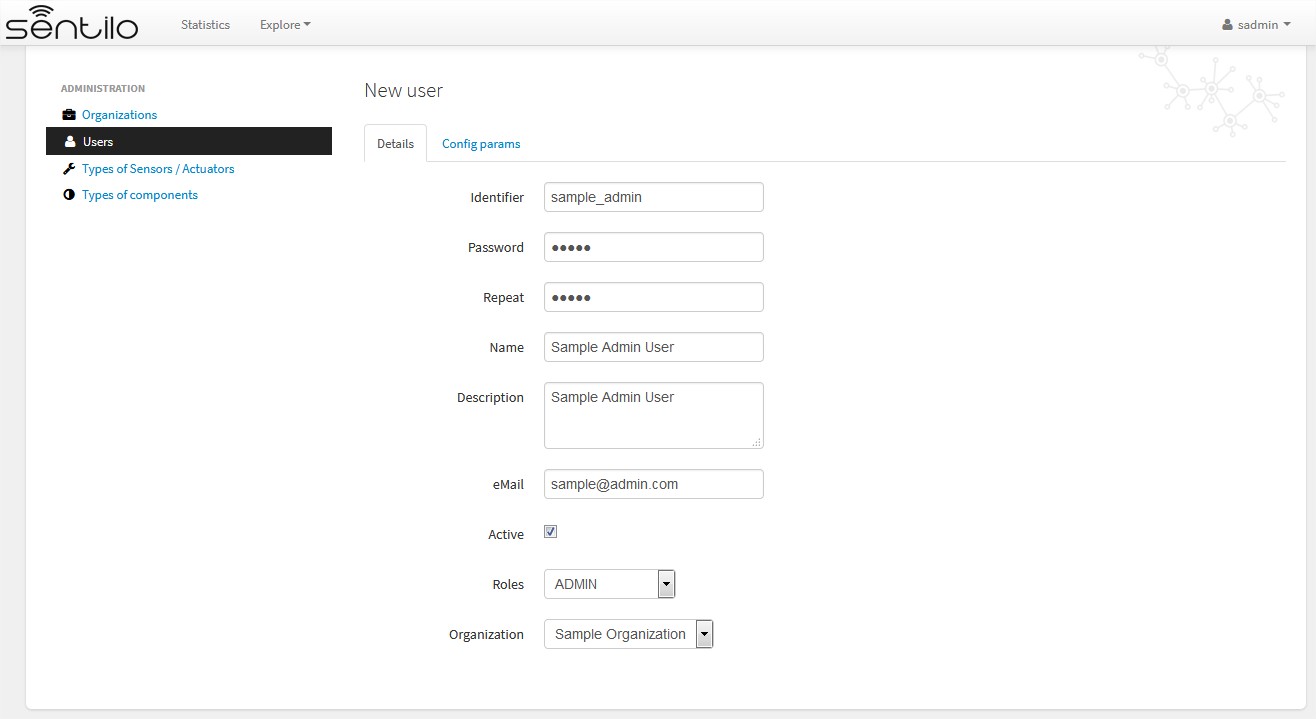
Alternatively, we can inform some configuration params that will modify the catalog visualization for this user:
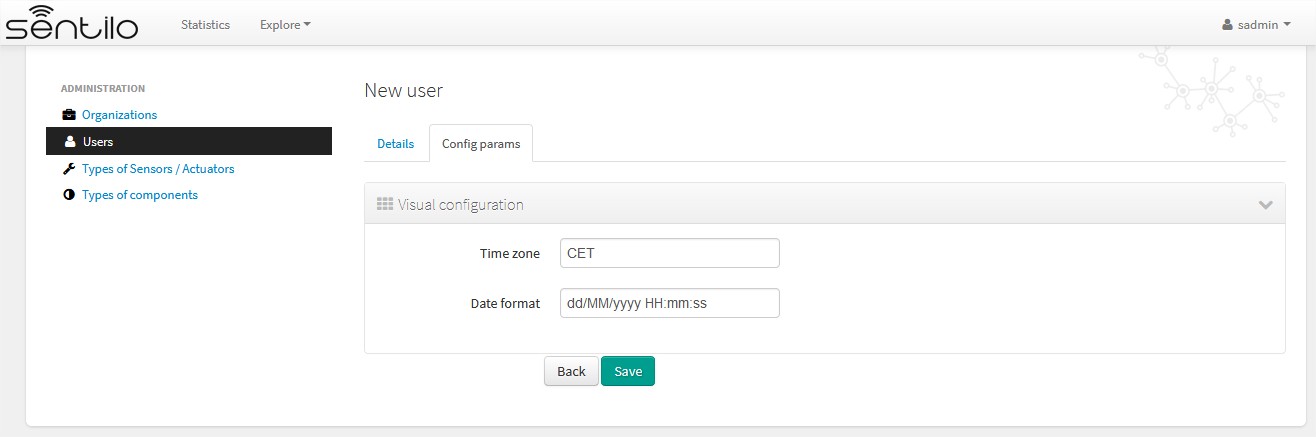
These params will apply to the entire catalog application visual customization, and how the user will see the data. Note that time zone & date format are directly relationated.
| Property | Description | Comments |
|---|---|---|
| Time zone | Defines the time zone of the user, and modifies the way to display data on screen, such as dates | You can define hourly difference or time zone abbreviations: CET, UTC, +001… Example: dd/MM/yyyy HH:mm:ss = 30/11/2017 15:34:56* Note that this value overrides the organization’s one, if informed* |
| Date format | Defines the date format with which the data will be displayed in the application (lists, details…) | See all possible formats as Java Date Format, at: Java Date Format Note that this value overrides the organization’s one, if informed |
Component and Sensor types administration
Only the Super Admin user can administer the components and sensor types. In this case, the behaviour is the same like for a normal Sentilo instance.
See more information about it in the [[Catalog and Maps section>>doc:Catalog & Maps]].
Tenant administration
Admin role users are directly related with an specific organization. They are the only ones who are able to administer the organization private data, such as its providers, applications, components, sensors and alarms. They can also manage its own users. The admin users will also be capable of seeing all the defined component and sensor typologies, but they wont be able to modify them.
Basically, the only difference between the simple Sentilo instance and a Multi Tenant instance version is that only users from one organization can see and access to information from its own organization. It’s also possible to share information with another organizations, as described later. This data isolation make possible taking advantage of user and organization hierarchy.
Below, we review the specific behaviour of tenant administration, remarking is specificities. For more information, you can read the [[Catalog and Maps>>doc:Catalog & Maps]] section.
Organization administration
Admin users can only manage its own organization information.
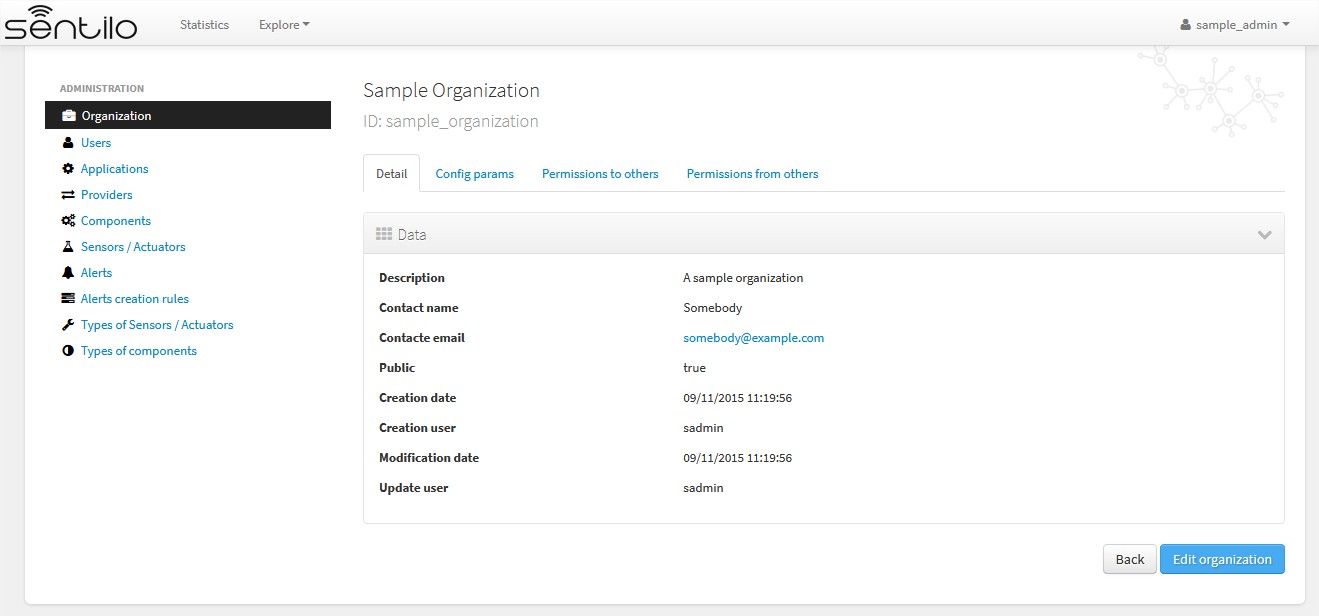
Alternatively, Admin user can manage their config params and third party from/to permissions for sharing information purposes. You’ll find them in the two last tabs that located in the top of the detail section.
Permission administration
Permissions list
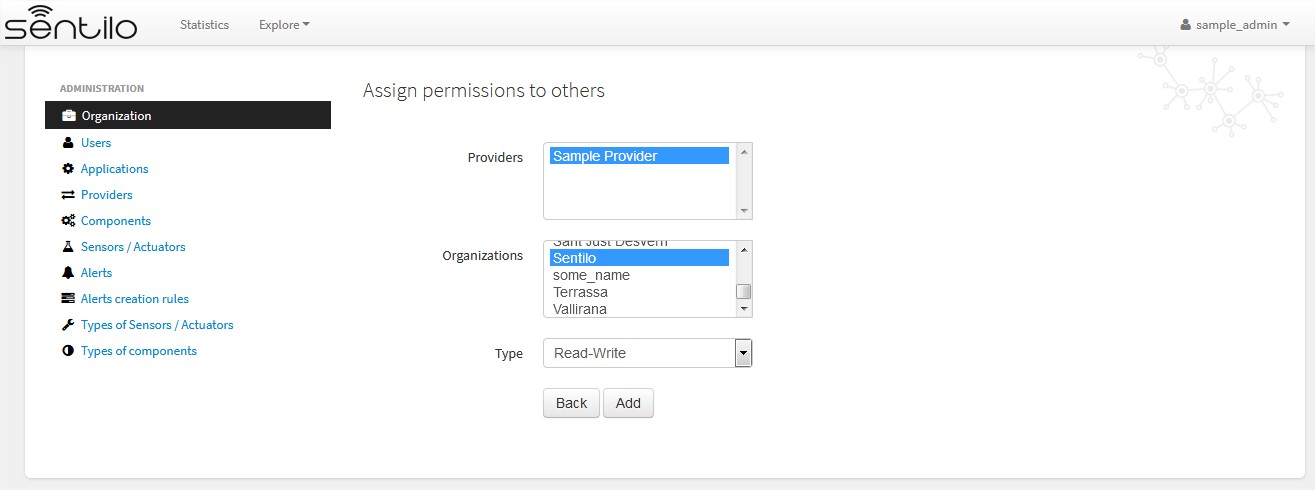
Adding permissions
Adding to third party read & write permission:
Response upon permission has been created:
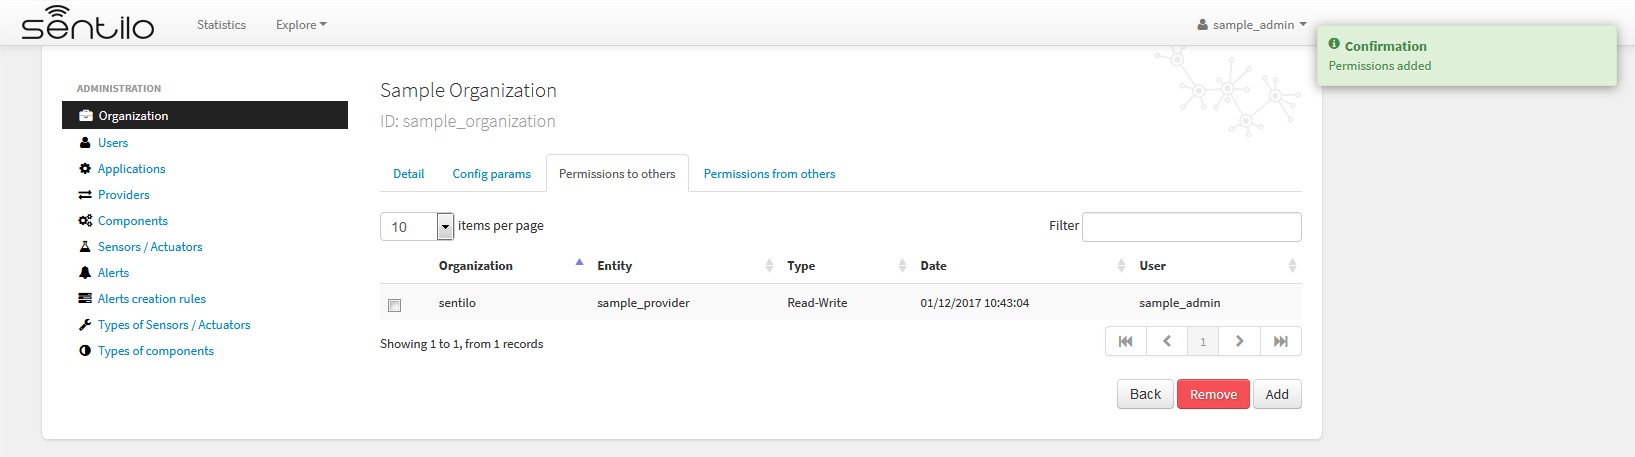
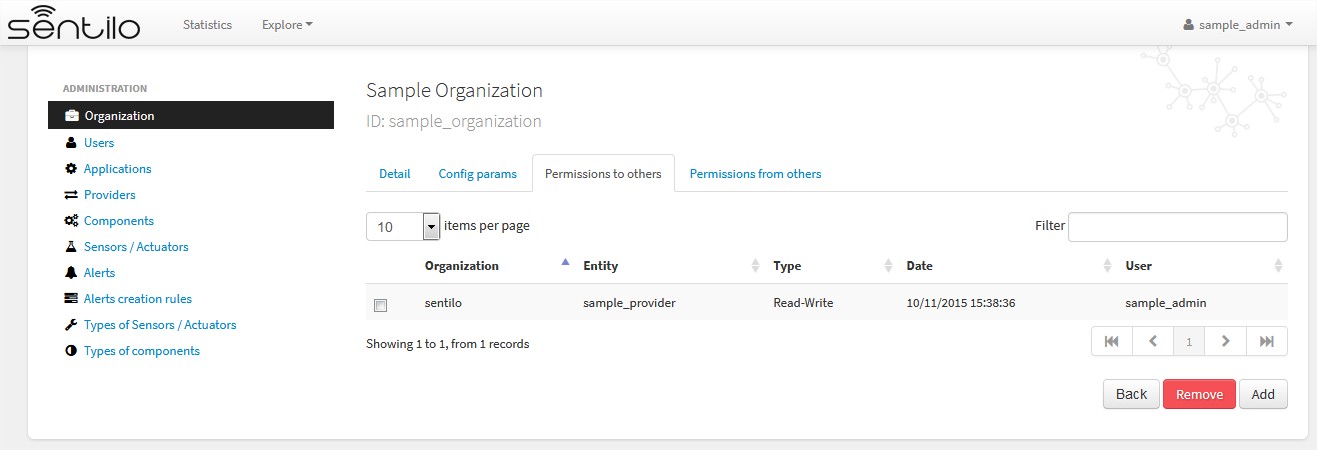
In this case we had granted read&write permissions from our organization and our provider sample_provider to third party organization named Sentilo. So, now the Sentilo organization can access to the sample_provider data and manage ii (publish data).
In the other side, the Sentilo organization can see these permissions in the second tab, Permissions from others:

And now, from this tab, we can change the permission visibility on the map. Simply select the checkbox from the permission and click on Show in map or Hide in map.
When sharing providers with other organizations, their related entities(providers, components, sensors), will appear on the other tenant console, but only in read mode.
Tenant resources administration: unique identifiers
Resources related to a tenant, such like providers and applications, must have unique identifier into a Sentilo instance. But, in a multi tenant instance, it is possible to repeat it identifier, based on its tenant. So tenant resources are completely independent between their tenants.
Multi tenant instances offers to the user a little visual difference. You will inform the resource identified with its own tenant identifier as prefix.
It is transparent for users, but in administration console you’ll see a flag that informs you that you’re in a multi tenant instance: sentilo@the_identifier, is related to an identifier from Sentilo tenant organization
Applications
For application creation form you’ll see this in the Identifier field:
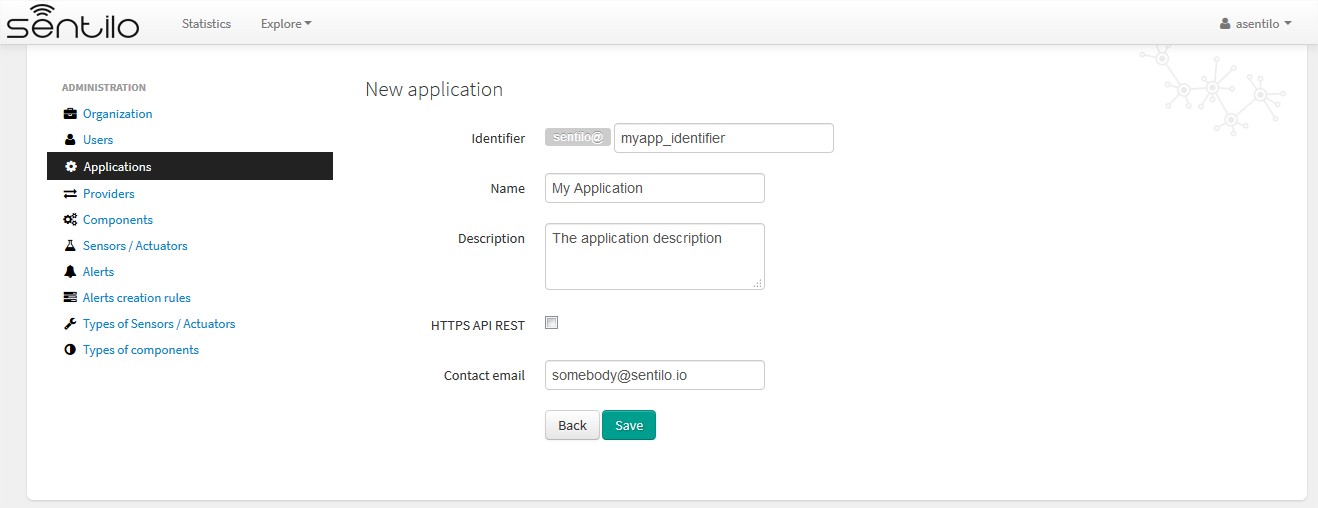
In this case, we’re creating a application named My Application with identifier myapp_identifier.
Providers
For the providers, we would be facing the same case as for the Applications. Therefore, you can choose the desired identifier, regardless of the tenant you are managing.
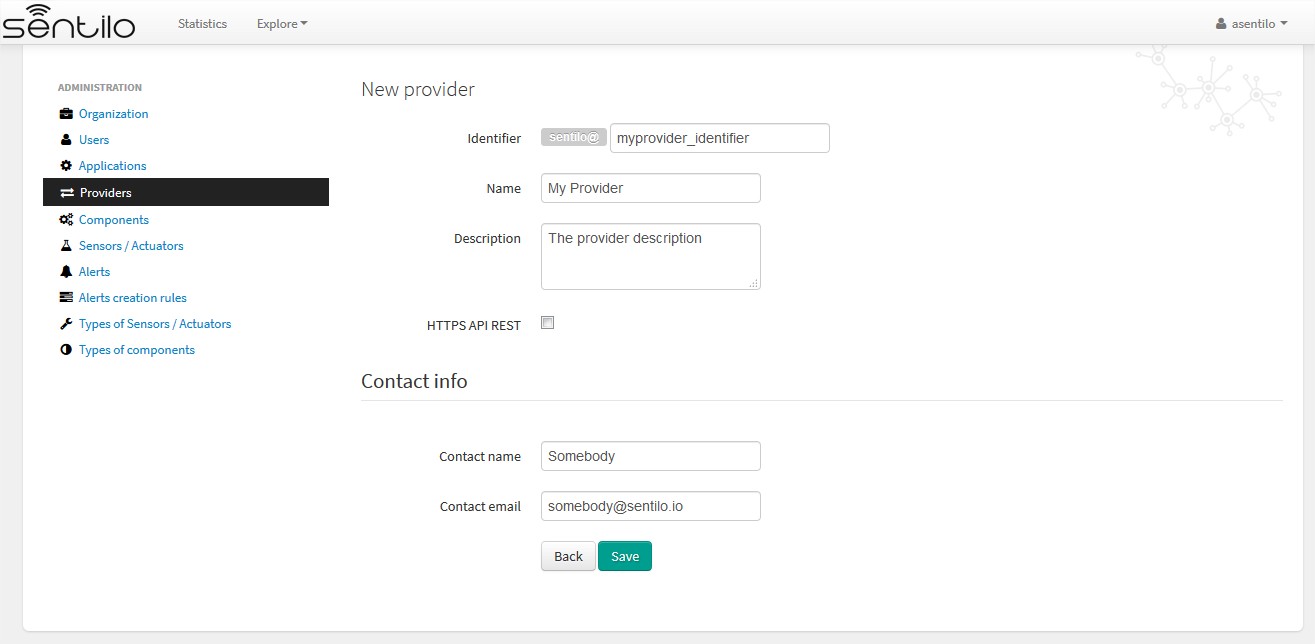
In this case, we’re creating a provider named My Provider, with identifier myprovider_identifier.